Hardware
- Raspberry Pi 4
- 5V 3A power supply
- 128GB SD card
Software
- Synpse - provides app deployment, SSH and HTTPS access.
- Node-RED - low-code programming for event-driven applications.
- Ubuntu 20.04.2 LTS image. Feel free to use Raspberry Pi OS (previously called Raspbian).
- Docker - deploying containers on the edge devices prevents a lot of issues.
Intro
There are plenty of articles on the internet on how to start the Node-RED on your PC/laptop/RaspberryPi, however, most of them lack basic things like ensuring remote access to your Node-RED instance, SSH, updates and so on. We will try to address them :)
In this short tutorial we will setup a Node-RED on a RaspberryPi. Using this installation method you will get few great things out of the box:
- Monitor your device uptime, CPU/RAM metrics.
- SSH from anywhere, even if you can’t ping your device directly.
- Public HTTPS URL to connect to Node-RED from anywhere in a form https://dev-{YOUR ID}.synpse.cloud
Step 1: Install Docker
Depending on your RaspberryPi OS Docker installation might vary but in most cases this script from https://docs.docker.com/engine/install/ubuntu should do the job:
curl -fsSL https://get.docker.com -o get-docker.sh
sudo sh get-docker.sh
Step 2: Install Synpse agent on your device
Log into your Synpse account, navigate to the “Devices” section and then click on “Provision”. Use the command in your RaspberryPi terminal. This will download, install and initialize the synpse agent.
Once the device has appeared in your Synpse dashboard:
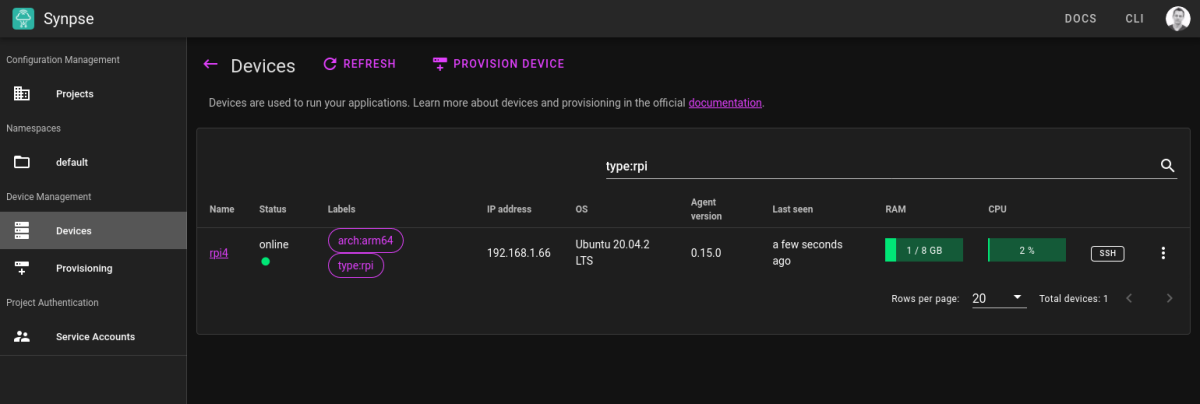
Once device is visible, click on the “edit labels” from the menu. Add a label ‘type: rpi’:
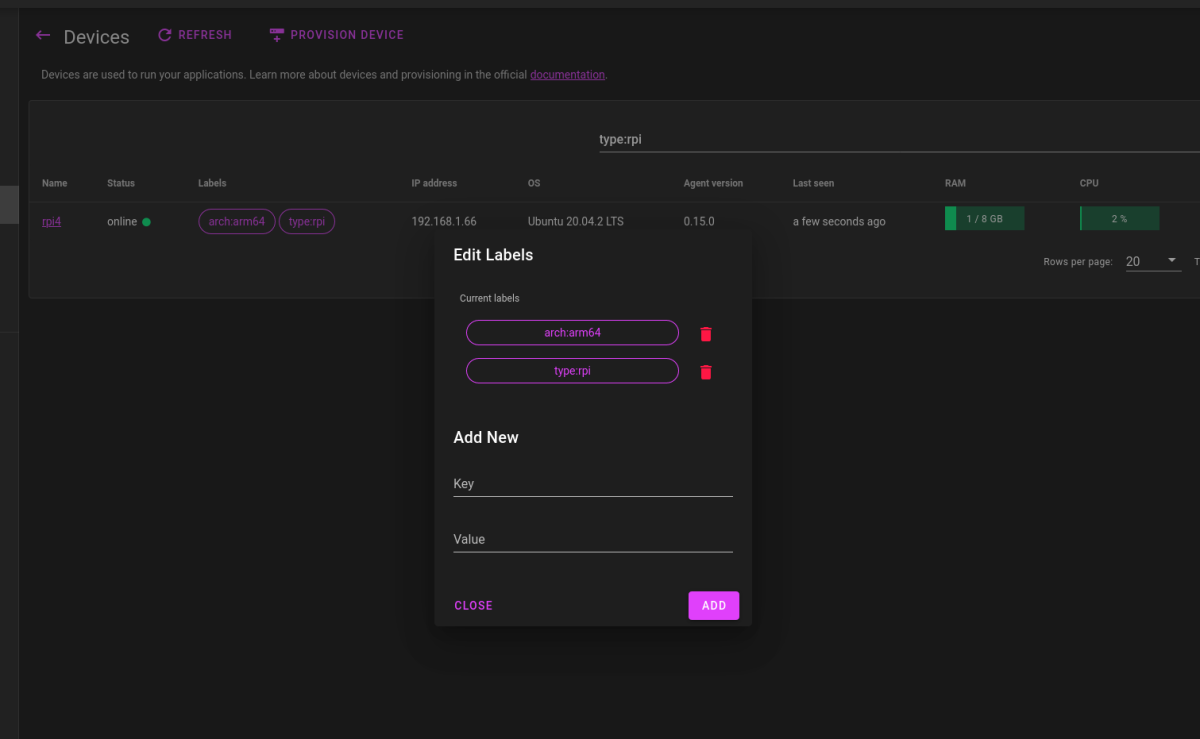
In Synpse, applications are installed into the devices based on device labels so it’s a good practice to label your devices accordingly.
Step 3: Create Node-RED deployment
Applications in Synpse are defined in yaml format. If you have used Docker Compose or Kubernetes before, it will feel familiar. You can read more about them here.
To create the application:
- Select the namespace (should be ‘default’ on the left side menu)
- Click on “New Application” button in the top
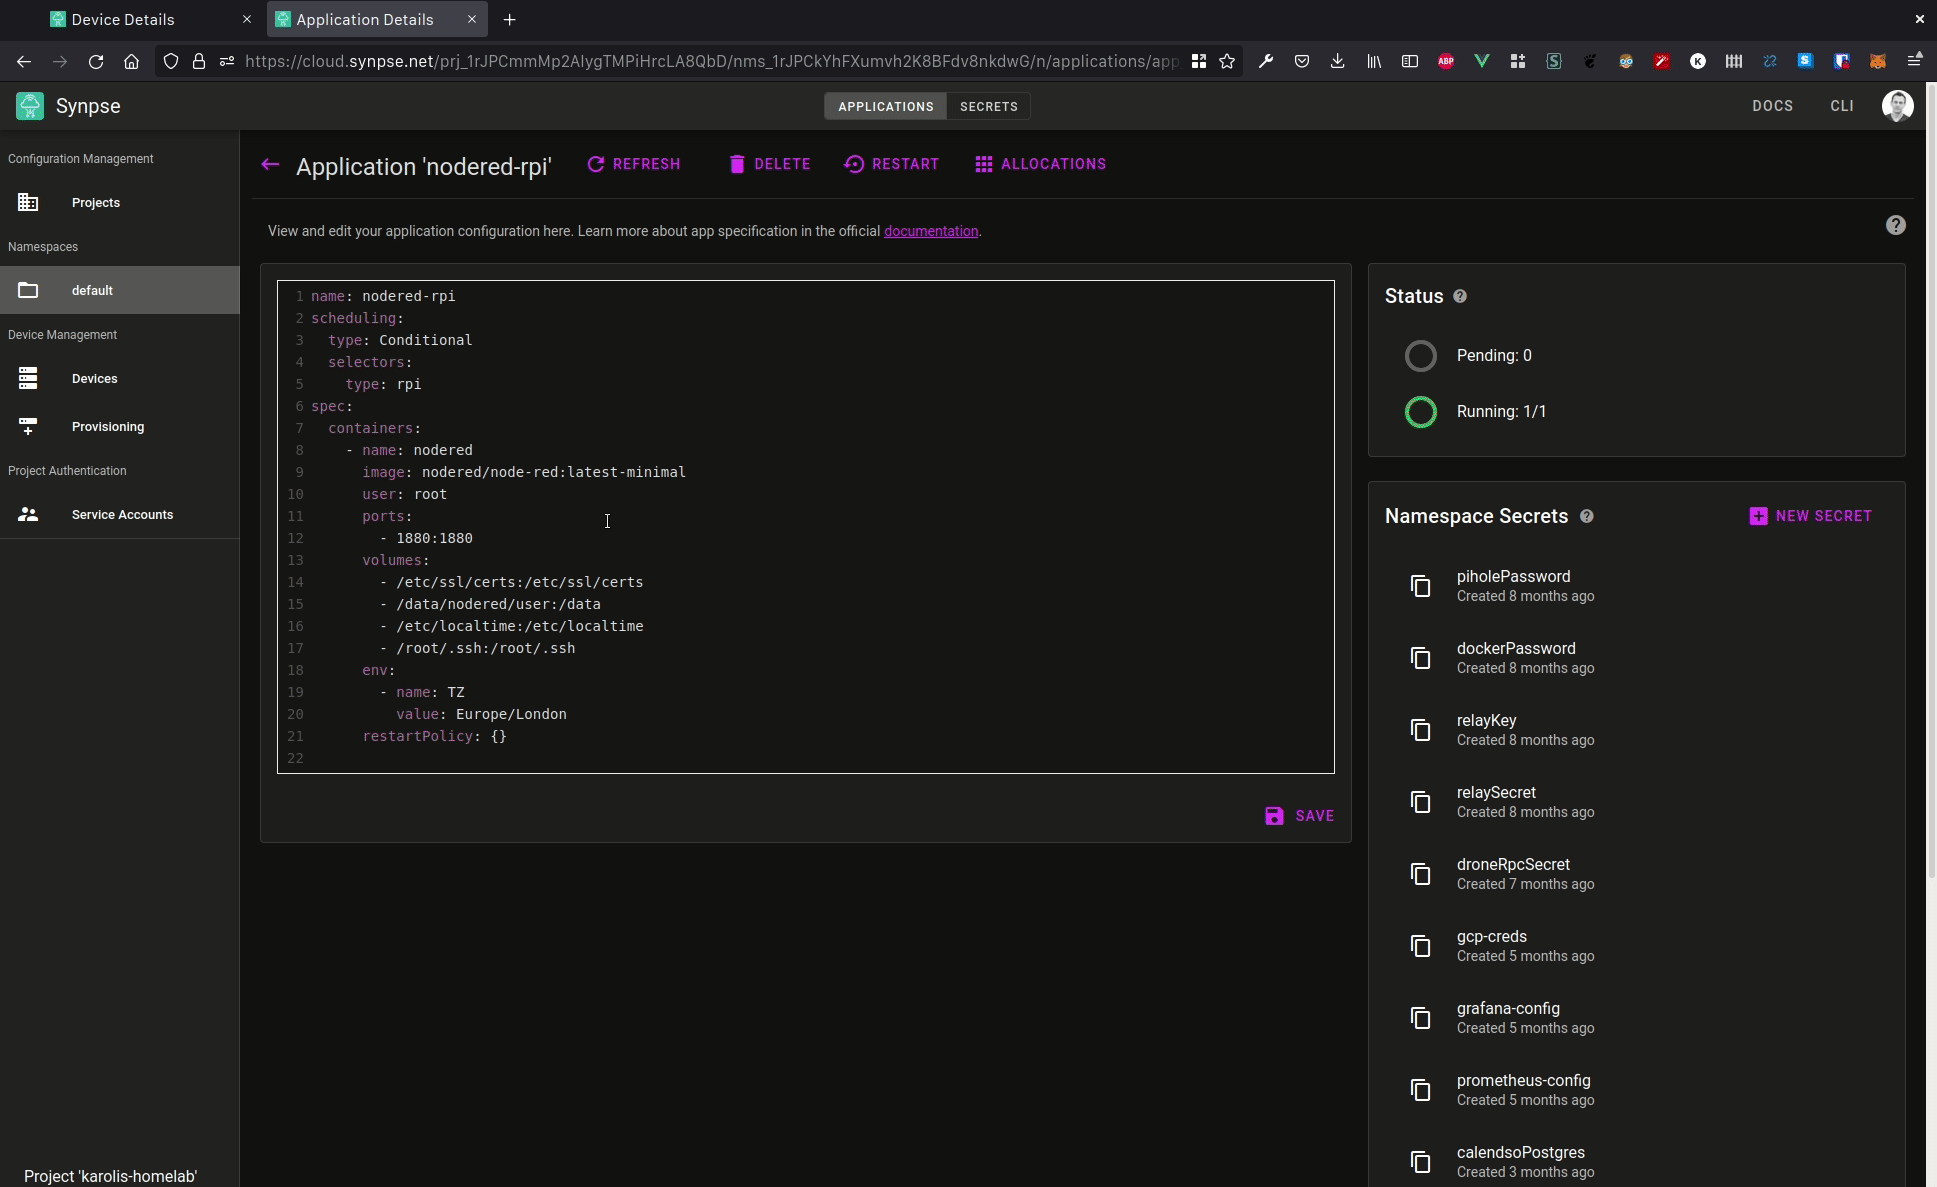
- Copy paste the yaml from below
|
|
Once deployed, it will take a few seconds or minutes (depending on your internet speed) to download and start the Node-RED docker container. Once started, you can access it on http://{YOUR DEVICE IP}:1880 address.
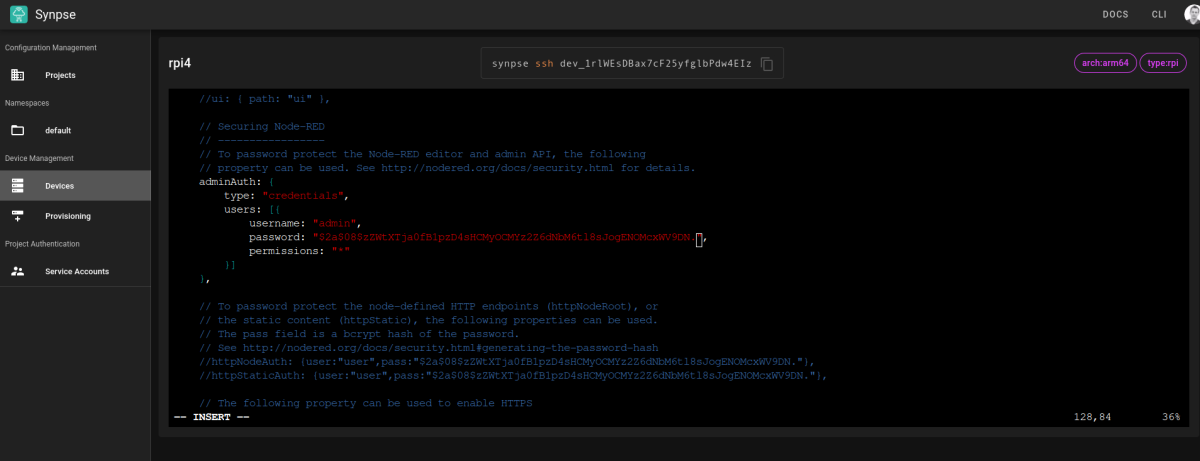
Step 4: Securing Node-RED with username/password auth (important)
We will be following the official documentation on securing the device. We will just adapt it to do everything in the container so we don’t have to install node/npm packages locally.
While in the device details page click on the SSH button in the top. This will open a web shell on your device. First, locate the node-red container with:
|
|
Result should look similar to:
|
|
Then, exec into the container:
|
|
Let’s run a command to generate the password hash for us:
|
|
Type your password. It should return a hash that looks something like $2b$08$VPBnuPxHFh96PsgVJvQLoe99iQDZh/d6R93sXZb8Xak0sS7OiUdt.. Leave the container (ctrl+D), next steps will be done through the web shell on the device again.
Now, let’s locate our settings.json file which should be in /data/nodered/user/settings.js and find the section:
|
|
Uncomment and replace the password with the generated one:
Back in your application details page, click on “Restart” button.
Step 5: Expose it to the internet so you can connect
At this step we will enable remote access via HTTPS to our Node-RED installation on the RaspberryPi. If you have skipped step 4, please do it, otherwise malicious users or automated bots could hijack your device.
- Go to your device details
- In the top right corner set the port to your Node-RED port which should be 1880
- Turn on the switch
Next Steps
Troubleshooting Node-RED issues
Sometimes bad things can happen, some Node-RED flow might stop working. Things you can do through Synpse:
- Check if device is still “online”. If not, probably there’s something wrong with power or internet.
- View application logs in Synpse. This will also preserve logs between container restarts.
- Try using some older image such as
nodered/node-red:2.1.4-1as some breaking change might have happened :) - SSH into the device through Synpse web shell and try looking for clues and eventually ask for help in the forum, people there are usually helpful!
Updating
If you are using the latest-minimal image, you only need to click on “Restart” for Synpse to pull the new container and restart it. You might also want to stick with specific versions. In that case instead of using the latest tag, specify whichever you wish to keep long-term.
Deploy more things!
When it’s easy to deploy applications, it’s simple to stack a lot of them into each of your devices. Modern hardware can accommodate a lot I am running things like Drone CI, uptime monitoring, Home Assistant, Grafana, Prometheus, etc.
