WireGuard is an extremely simple yet fast and modern VPN that utilizes state-of-the-art cryptography. It aims to be faster, simpler, leaner, and more useful than IPsec, while avoiding the massive headache. It intends to be considerably more performant than OpenVPN. WireGuard is designed as a general purpose VPN for running on embedded interfaces and super computers alike, fit for many different circumstances. Initially released for the Linux kernel, it is now cross-platform (Windows, macOS, BSD, iOS, Android) and widely deployable. It is currently under heavy development, but already it might be regarded as the most secure, easiest to use, and simplest VPN solution in the industry.
Combined with Synpse, it becomes super easy to configure and use! No more paying for VPNs that steal your data!
Technologies used
- Synpse for hosting and running applications anywhere
- Wireguard VPN provider
- Cloudflare DNS management
Pre-requisites
If you don’t own a domain, and don’t have a need for it - you can use DuckDNS to get one for free. We are going use Cloudflare as we already own a domain, personally I find it the best way to control your DNS settings.
And because our device is in our home network, we will have to configure port forwarding for our device.
Step 1: Configure Cloudflare
To get your own IP from anywhere inside your home network, run this command in the terminal:
curl https://ifconfig.me/

Step 2: Configure port forwarding
In order for your device to be reachable from the internet, you will need to configure your router with port forwarding into our device in home network. We use D-Link DIR-815.
We configure Virtual Server to forward port 51820 to forward to synpse device.
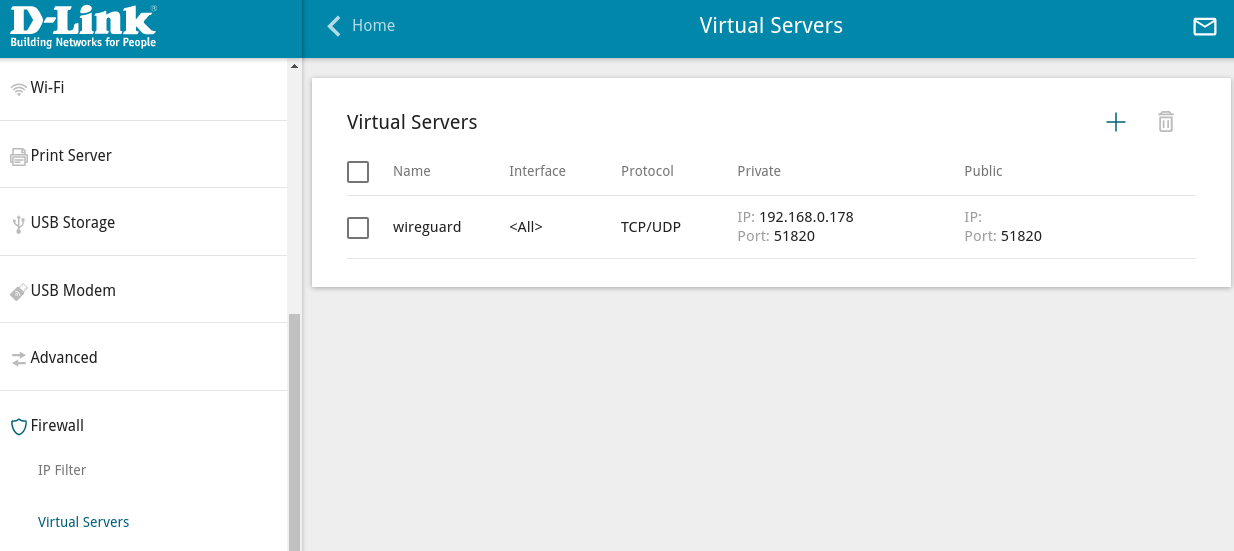
The important part here is to ensure that router is port forwarding UDP protocol (not TCP) as Wireguard requires it. If you are not sure then enable both protocols.
Deploy the Wireguard server
|
|
Download configuration
Once this is done and Wireguard starts successfully, it will emit configuration into console. and write a bunch of files.
You can use synpse application logs <wireguard> --device <device-name> to get codes. In our case we will backup the configuration locally from remote device for us to use later:
|
|
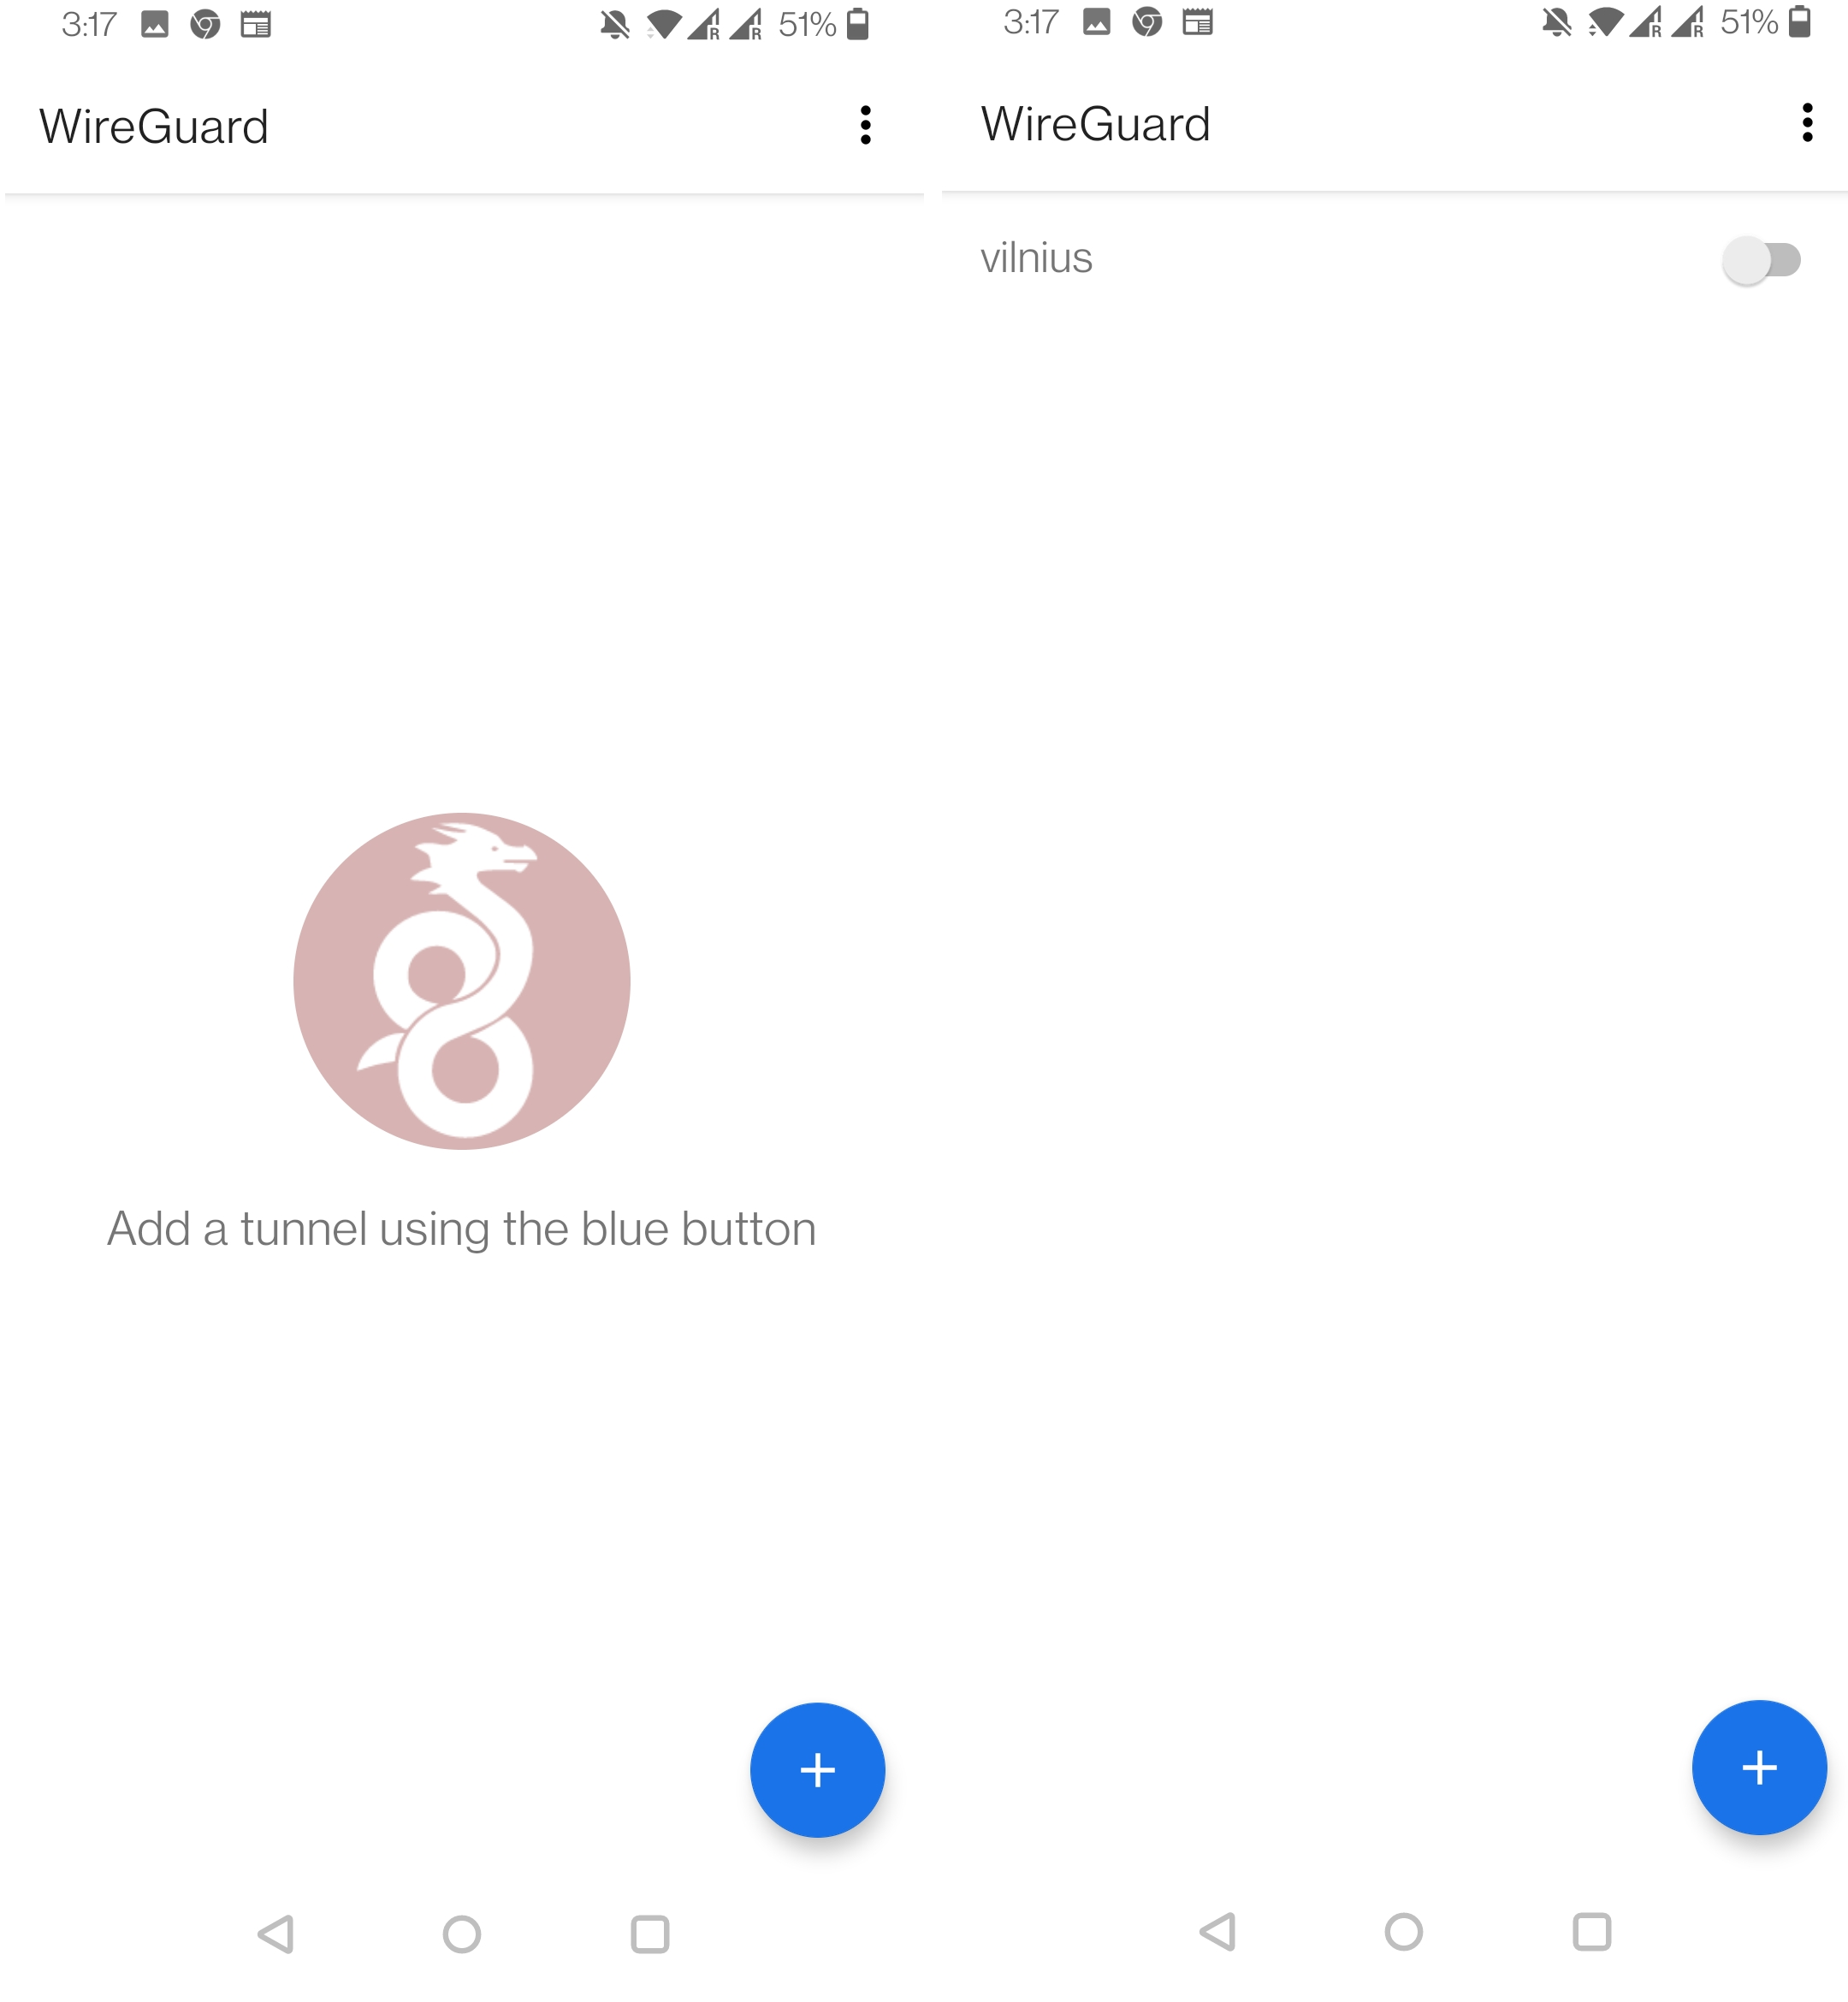
Get out your phone and install Wireguard application. Once inside the app you will see the option to import configuration by scanning a QA code, use it to scan the picture from $HOME/Documents/peer_phone/peer_phone.png.
And add your endpoint!
./wrap_up.sh
And this is it! If all steps have been done right, you have free VPN. Simple and powerful setup.
If you have any questions or suggestions, feel free to start a new discussion in our forum or drop us a line on Discord
