If you want to know how to prepare a device for Synpse, you can read the article How to create image for your device or we have a few guides to help you with that.
In this article we will assume that you already have device running Linux and you want to use it with Synpse.
###Join the Synpse cloud
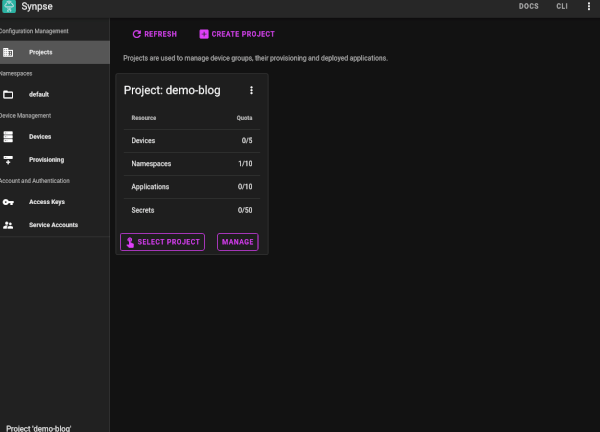
Jump to Synpse Cloud and login with either your GitHub or Google account and create a new project. Project is the object where all your configuration is located.
Projects in Synpse are the top level resource. All resources such as Devices, Namespaces, Applications and Secrets belong to the Projects. This enables having flexible role-based access control to enable collaboration, as well transferring projects between the users.
###Get device registration token
Once you have a project, create a device registration token. We pre-created one for you, if you want to use the default one.
Device tokens can have configuration options, so you can change it to fit your needs. Check the documentation for more details. We just want to notice one important parameter - Max registrations. This allows you to control how many devices can be registered with a single token.
Go ahead and copy install command from Provisions device:
###Register the device
Once you have your token copied - just paste it into your device shell and observe the magic:
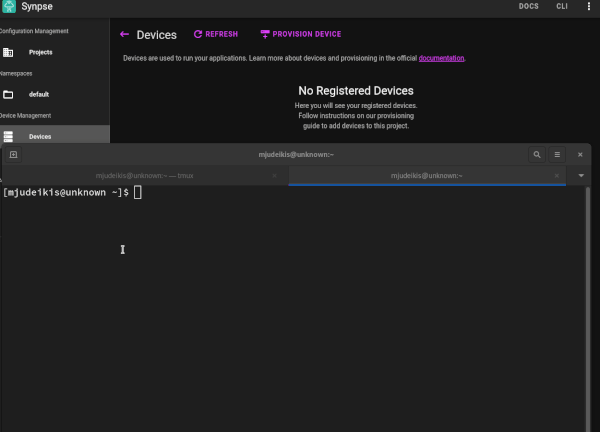
Important: Synpse currently requires Docker to be installed on the device to to run the containerized workloads. Refer to Image building guide for more information.
This is it: You have your device registered and ready to use. Feel free to explore device via UI or CLI.
###Next steps
Once you have your device, the next step could be deploying an application!
